Here's what you need to get started:
- WSDL2ObjC. I'm going to use WSDL2Objc-0.7-pre1.zip for this tutorial. You can get this from the project's home page.
- A web service to consume. For this tutorial, we'll use the "Barcode" service (http://www.webservicex.net/genericbarcode.asmx). This service will accept a complex SOAP datatype defining various options to generate a barcode, and will return data which represents the barcode image.
Let's go.
1. Generate the stubs with WSDL2Objc.
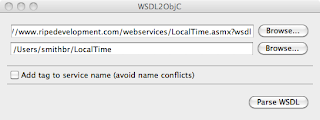
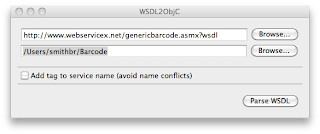
Start WSDL2ObjC. In the first field, enter the name of the source WSDL. You can specify a local file, or a web address. For the barcode service, enter http://www.webservicex.net/genericbarcode.asmx?wsdl In the second field, specify a directory into which WSDL2ObjC will create the new files. You can use the Browse button to specify a particular directory. When you click "Parse WSDL," you will see a few messages, one of which should say it is generating Objective C Code into the output directory. Check the target directory to make sure your files are there.
 2. Create the project in Xcode.Start Xcode and create a new View-based Application. Call it anything you'd like. In the .h file for the controller, add an action method called buttonPressed, and then two outlets called dataToEncode and barcodeImage.
... UIViewController {
UITextField *dataToEncode;
UIImageView *barcodeImage;
}
@property (nonatomic, retain) IBOutlet UITextField *dataToEncode;
@property (nonatomic, retain) IBOutlet UIImageView *barcodeImage;
-(IBAction)buttonPressed:(id)sender;
In the .m, add the lines to @synthesize dataToEncode and barcodeData, then add the boilerplate for buttonpressed:
-(IBAction)buttonPressed:(id)sender
{
}
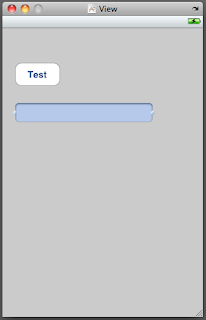
Save these files, then open the controller's NIB with Interface Builder. Place a text field and a button on the View. Call the button "Test" or whatever you want, place the field anywhere you want, and add "Data to encode" as a placeholder, if you want. Add a UIImageView. Mine looks like this:
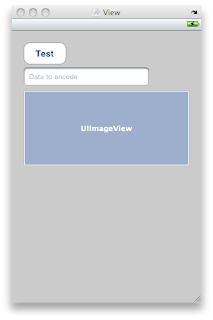 Now hook the button's Touch Up Inside event to the buttonPressed action, and connect the dataToEncode outlet to the UITextField, and connect the barcodeImage outlet to the UIImageView. Save the file and close Interface Builder.
Go ahead and build and run, just to make sure everything's OK so far. I expect everything to be OK, but it doesn't hurt to check.
3. Pull in the WSLD2ObjC generated code.
Let's pull in the code WSDL2ObjC wrote for us: in the project add a new Group named "BarCode SOAP classes". With Finder, drag all the files that it created into the new group. Tell Xcode to copy the items into the destination folder.
Take a look at Barcode.h. There's a ton of stuff here: definitions for bindings, responses, requests, etc. This code corresponds to the data that WSDL2ObjC pulled out of BarCode's WSDL.
Before compiling from this point we have to do two things to our build target: open the Targets group, right-click your target, then select "Get Info," and then "Build." Do the following:
- In the Linking section, find "Other Linker Flags." Add the -lxml2 to the Linker Flags.
- In the GCC 4.2 - Code Generation section, find "Other C Flags." Add -I/usr/include/libxml2 to Other C Flags.
4. Write.
Let's write some code. Open the .m for your controller. #import "Barcode.h". Now let's write our buttonPressed method:
- (IBAction)buttonPressed:(id)sender { BarCodeSoapBinding *binding = [[BarCode BarCodeSoapBinding] initWithAddress:@"http://www.webservicex.net/genericbarcode.asmx"]; binding.logXMLInOut = YES; BarCode_BarCodeData *params = [[BarCode_BarCodeData alloc] init]; params.Height = [NSNumber numberWithInt:125]; params.Width = [NSNumber numberWithInt:225]; params.Angle = [NSNumber numberWithInt:0]; params.Ratio = [NSNumber numberWithInt:5]; params.Module = [NSNumber numberWithInt:0]; params.Left = [NSNumber numberWithInt:25]; params.Top = [NSNumber numberWithInt:0];params.CheckSum = NO;params.FontName = @"Arial";params.BarColor = @"Black";params.BGColor = @"White";params.FontSize = [NSNumber numberWithFloat:10.0];params.barcodeOption = BarCode_BarcodeOption_Both;params.barcodeType = BarCode_BarcodeType_Code_2_5_interleaved;params.checkSumMethod = BarCode_CheckSumMethod_None;params.showTextPosition = BarCode_ShowTextPosition_BottomCenter;params.BarCodeImageFormat = BarCode_ImageFormats_PNG;BarCode_GenerateBarCode *request = [[BarCode_GenerateBarCode alloc] init];request.BarCodeText = [dataToEncode text];request.BarCodeParam = params;BarCodeSoapBindingResponse *resp = [binding GenerateBarCodeUsingParameters:request];for (id mine in resp.bodyParts){if ([mine isKindOfClass:[BarCode_GenerateBarCodeResponse class]]){UIImage *barcode = [UIImage imageWithData:[mine GenerateBarCodeResult]];[barcodeImage setImage:barcode];}}[request release];[params release]; }
We create a binding, then associate it with the Barcode Generator service endpoint. We then create a request, fill in the blanks, then call the service. The service returns a BarCodeSoapBindingResponse which we save in resp.
Now about that request. If you look at the definition of BarCode_GenerateBarCode you'll see it has two parts: BarCodeText, a NSString representing the data to encode, and BarCodeParam, which is an object representing a set of parameters affecting the barcode I'm going to get. BarCodeParam covers things like dimensions of the image, the barcode symbology to use, etc. You can see how I set the parameters. Now how did I know what to set each to? In the WSDL definition you can see each element and its type, so I know which parameters need a number, which need a string, and so forth. If you look in Barcode.h that WSDL2ObjC generated, you will also find enum values for options like which barcode symbology to use, image format to return, etc.
The response type has a field called bodyParts. The code runs through bodyParts, looking for the response to the call. It then builds a UIImage based on the PNG data I asked for, and sets barcodeImage's data to that.
5. Run.
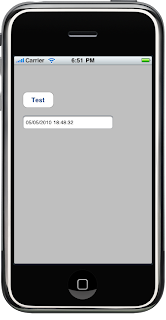
Save everything. Under the Run menu, bring up the console, then build and run. Enter data into the field, then click the "Test" button. In the console, you should see the outbound request, and then the response. And in the simulator, of course, you should see your barcode.
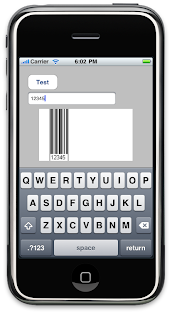
And that's all there is to it. Next time, we'll talk about asynchronous calls.
As always, let me know what you think.
